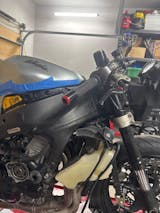
How to Choose and Replace a Motorcycle Clutch Lever
# How to Choose and Replace a Motorcycle Clutch Lever
Replacing your motorcycle clutch lever might seem like a daunting task, but with some guidance, it becomes a straightforward procedure. This guide will walk you through the process of choosing and replacing your motorcycle clutch lever, ensuring that your ride remains smooth and responsive.
## Choosing the Right Motorcycle Clutch Lever
Selecting the right clutch lever is critical for your bike's performance and your comfort while riding. Here are some essential factors to consider:
### Material and Durability
- Aluminum: Lightweight and resistant to corrosion, aluminum levers are a popular choice.
- Steel: Known for strength and durability. However, it may be heavier than aluminum.
- Composite Materials: Offers a balance of strength and lightweight characteristics.
### Ergonomics
- Adjustability: Look for levers that can be adjusted to fit your hand size and riding style.
- Reach: Ensure the lever’s distance from the handlebar is comfortable for your grip.
### Compatibility
- Model Specific: Not all levers fit every motorcycle. Check compatibility with your specific bike model.
- Universal Fit: Some levers offer a universal fit, but always confirm compatibility before purchasing.
### Aesthetics
- Color: Match or contrast the lever’s color with your bike for a personalized look.
- Design: Consider the overall style, as levers come in a variety of designs.
## Steps to Replace a Motorcycle Clutch Lever
Replacing your clutch lever can be done with basic tools and some patience. Follow these steps:
### Tools Required
Socket wrench set
Screwdrivers
Allen keys
Lubricant (optional)
### Step-by-Step Guide
1. **Prepare Your Workspace**
Ensure the motorcycle is stable on a flat surface.
Turn off the engine and let it cool.
2. **Remove the Old Clutch Lever**
Locate the pivot bolt holding the lever in place.
Use the appropriate wrench or socket to remove the bolt.
Slide out the old lever while keeping track of any washers or spacers.
3. **Install the New Clutch Lever**
Align the new lever with the mounting bracket.
Insert any necessary washers or spacers along with the pivot bolt.
Tighten the bolt securely using a wrench, ensuring it moves smoothly once tightened.
4. **Adjust the Lever**
Use the adjuster dial or bolt to set the lever reach to a comfortable position.
Check for proper operation and adjust as needed.
## Tips for Maintaining Your Clutch Lever
Following the installation, regular maintenance can extend the life of your clutch lever. Here are some suggestions:
Apply lubricant periodically to smooth the lever motion.
Check for wear and tear regularly.
Ensure all components are tightly secured after adjustments.
## Conclusion
Replacing a motorcycle clutch lever is a task that can be tackled with confidence when equipped with the right tools and knowledge. Whether you're upgrading for performance or replacing a damaged lever, these tips will help you ensure a smooth and safe ride. By selecting the right lever and maintaining it, you can enhance your riding experience significantly.
Posted on September 25 2025


0 comments